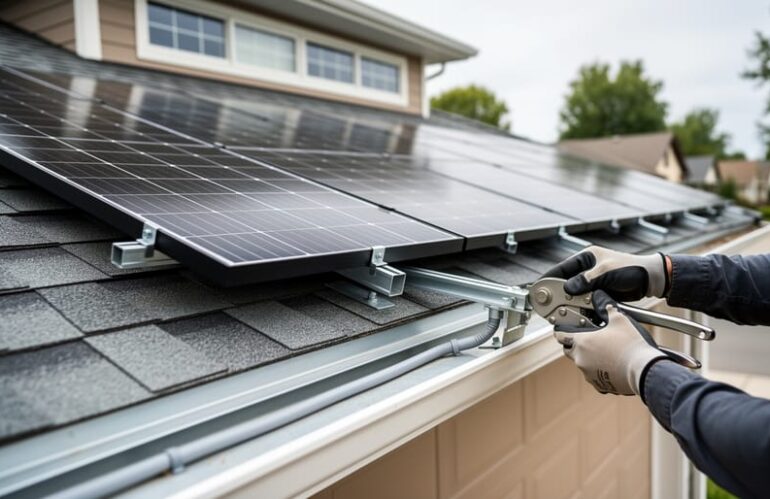
Installing solar panels on your roof typically takes one to three days for a professional crew and involves mounting racking systems to roof joists, wiring panels together in series, and connecting the array to an inverter that feeds your home’s electrical system. While most homeowners hire licensed installers for safety and warranty reasons, understanding each phase of the process helps you evaluate contractor proposals, verify quality work, and make confident decisions about system design.
The installation complexity depends heavily on your roof type, angle, and structural capacity. A straightforward south-facing asphalt shingle roof with easy attic access represents the simplest scenario, while tile, metal, or flat roofs require specialized mounting hardware and weatherproofing techniques. Before any panels go up, a structural engineer should confirm your roof can handle the additional weight, and your utility must approve interconnection plans.
Sarah Chen, a solar installation supervisor with over a decade of experience, emphasizes that preparation matters more than speed. “I’ve seen DIY attempts that rushed through flashing details and ended up with leaks within six months,” she explains. “Professional teams spend nearly half their time on layout, measurements, and weatherproofing because those steps determine whether your system performs well for 25 years or creates expensive problems.”
The process breaks down into distinct phases: site assessment and permitting, structural preparation, mounting hardware installation, panel placement and wiring, inverter connection, inspection, and activation. Each phase builds on the previous one, and skipping steps or cutting corners on safety equipment puts both the installer and your home at risk. This guide walks you through what happens at each stage, what questions to ask contractors, and which warning signs indicate substandard work.
Assessing Your Garage Roof for Solar Panel Installation
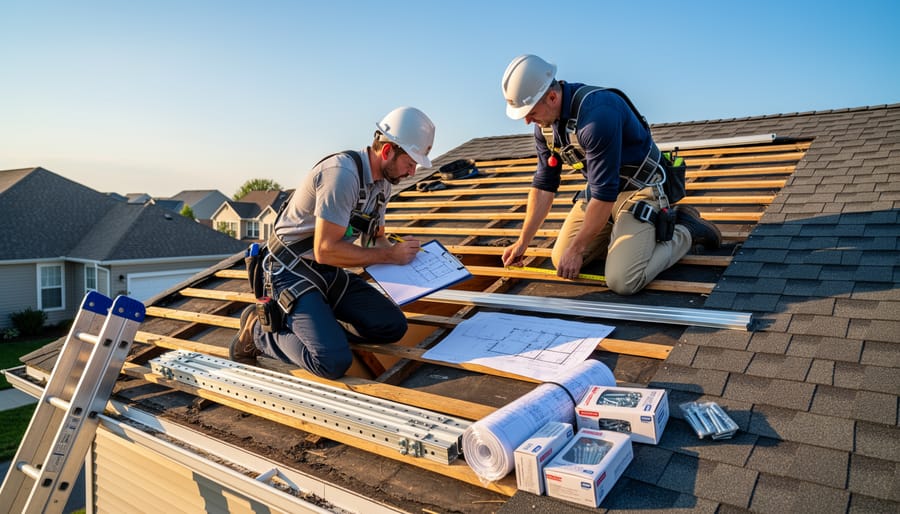
Before installing solar panels on your garage roof, you need to verify it can physically and practically support them. A thorough assessment now prevents costly mistakes and ensures your investment performs as expected.
Start with structural capacity. Solar panels, mounting hardware, and racking systems add weight to your roof structure. Most residential solar installations add between two and four pounds per square foot, though specific loads vary by system design and mounting type. Your garage’s framing, trusses, and foundation must handle this additional load safely, along with snow loads in winter climates and wind forces.
Roof condition and remaining lifespan matter significantly. Installing solar panels on a roof that needs replacement in five years creates unnecessary expense and complexity. Panels typically last 25-30 years, so you want a roof that will last at least 15-20 more years underneath them. Removing and reinstalling panels for roof replacement costs thousands of dollars. Inspect for signs of wear like missing shingles, sagging sections, water damage inside the garage, or deteriorating flashing. If your garage roof is approaching the end of its service life, replace it before installing solar.
Orientation and sun exposure determine how much electricity your system produces. In the Northern Hemisphere, south-facing roofs receive the most direct sunlight throughout the day and generate maximum output. East-facing and west-facing roofs still work effectively, though they produce slightly less over the year. North-facing roofs generally aren’t recommended except in specific circumstances. The angle at which your roof faces the sun matters more than perfect cardinal alignment.
Shading analysis reveals potential production killers. Even partial shade from trees, neighboring buildings, chimneys, or other structures can substantially reduce output. Observe your garage roof throughout the day during different seasons to identify shade patterns. Morning shadows from trees to the east, afternoon shadows from adjacent structures, and winter sun angles all affect performance differently. Professional installers use shade analysis tools to quantify these impacts precisely.
Roof pitch affects both installation complexity and panel efficiency. Pitches between 15 and 40 degrees work well for most solar installations, with 30-35 degrees considered optimal in many regions. Flat roofs require tilted mounting systems to achieve proper angle. Extremely steep pitches increase installation difficulty and cost but don’t necessarily improve performance.
Tools, Materials, and Equipment You’ll Need
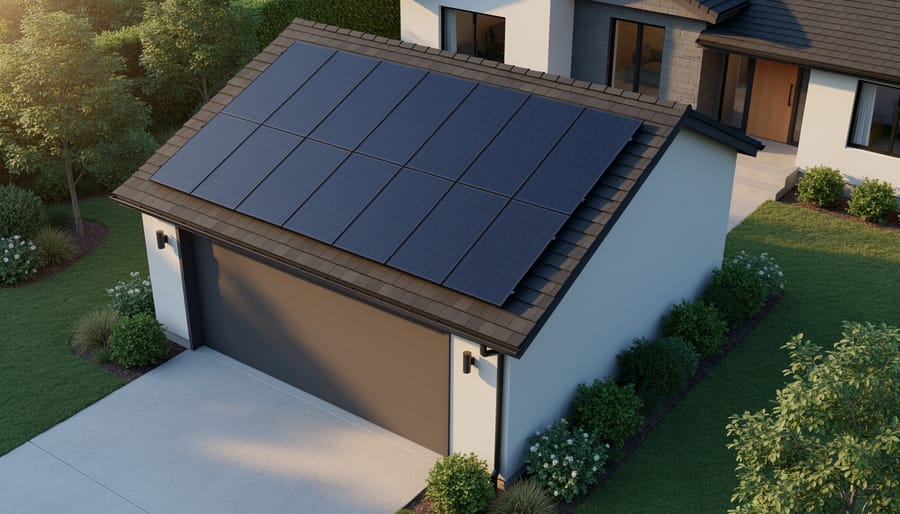
Understanding what goes into a solar panel installation helps you assess quotes, spot incomplete setups, and communicate clearly with contractors. While professional installers supply all necessary equipment, knowing the components ensures you’re getting a complete, code-compliant system.
Mounting Hardware and Structural Components
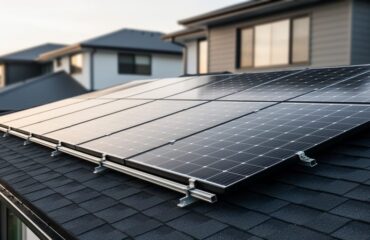
The racking system forms your solar array’s foundation. Installers use aluminum or stainless steel mounting rails designed to withstand decades of weather exposure. These rails attach to your garage roof through lag bolts that penetrate into rafters, not just roof sheathing. Flashing goes around each roof penetration to create waterproof seals, while specialized sealants designed for roofing applications prevent leaks. The mounting system must accommodate your specific roof type, asphalt shingle, metal, tile, or flat membrane, with appropriate attachment methods for each.
Essential Installation Components
- Solar panels sized and rated according to your system design
- Inverter (string inverter or microinverters) to convert DC power to usable AC electricity
- Electrical wire rated for outdoor and high-voltage use, plus weatherproof conduit
- Disconnect switches for safety isolation during maintenance or emergencies
- Grounding equipment including copper wire and grounding lugs
- Breakers and electrical panel upgrades if your existing service can’t handle the additional load
- Monitoring system hardware to track production and identify issues
Tools and Safety Equipment
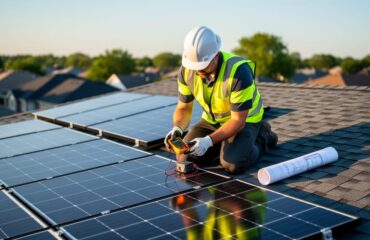
Professional crews bring heavy-duty cordless drills, impact drivers, socket sets, wire strippers, crimpers, and voltage testers. Working at height requires proper ladder or scaffolding systems rated for the work load. Fall protection harnesses meeting OSHA standards are mandatory when working on garage roofs.
Permits and Documentation
Every jurisdiction requires building permits for solar installations. Electrical permits cover the wiring and interconnection work. Your utility company needs an interconnection agreement before you can connect to the grid. While installers typically handle permitting, verify these documents are filed and inspections scheduled before work begins.
Essential Safety Precautions and Permits
Installing solar panels on your garage roof presents serious safety risks that you need to understand before proceeding. Whether you’re planning a DIY installation or hiring professionals, knowing these precautions helps ensure a safe project and keeps you informed during the process.
Fall Protection is Non-Negotiable
Working at height is the primary danger in any roofing project. If you’re attempting a DIY installation, you’ll need proper fall protection equipment including a safety harness, anchor points rated for fall arrest, and someone on the ground to assist. OSHA regulations require fall protection for work above six feet, and many local codes are even stricter. Ladders must be secured and extend at least three feet above the roof edge. Professional installers carry liability insurance and use commercial-grade safety equipment that most homeowners don’t own.
Electrical Safety Protocols
Solar panels generate electricity whenever light hits them, creating dangerous DC voltage even before your system connects to the grid. DC current doesn’t “let go” like AC current does, making shocks potentially more severe. You’ll need insulated tools rated for electrical work, proper lockout/tagout procedures when working with the inverter and electrical panel, and a clear understanding of which circuits are live. Most jurisdictions legally require licensed electricians to perform the final electrical connections and interconnection work.
Weather and Environmental Considerations
Never work on a roof during wet, windy, or icy conditions. Even morning dew can create slip hazards. Heat presents another danger, roof surfaces can exceed 150°F in summer, causing heat exhaustion and making tools dangerously hot to touch. Plan installations for mild, dry weather with low wind speeds.
Permits and Code Compliance
Nearly all solar installations require building permits and electrical permits from your local jurisdiction. The permit process typically includes submitting system plans, structural calculations, and electrical diagrams. After installation, inspectors verify code compliance before you can activate the system. You’ll also need utility approval and an interconnection agreement before connecting to the grid, which often requires upgrading your meter to track net metering credits.
Skipping permits creates liability issues, can void your homeowner’s insurance, and may require expensive system removal later. Professional installers handle all permitting and inspection coordination, ensuring your system meets local codes and utility requirements from the start.
Step-by-Step Solar Panel Installation Process
Step 1: Install the Mounting System
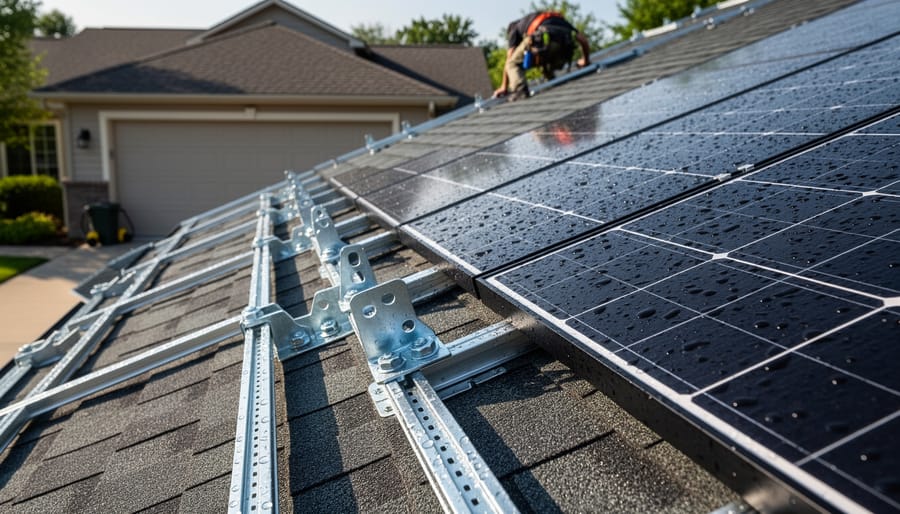
The mounting system forms the foundation of your solar installation, and proper installation is critical for both structural integrity and weatherproofing. This phase requires precision and careful attention to prevent roof damage.
Start by locating the roof rafters beneath your garage’s shingles or roofing material. A stud finder designed for roofing applications works well, though professionals often use blueprints or measure from known reference points. Mark rafter locations with chalk lines, planning mounting points that align with your panel layout. Proper spacing depends on your racking system specifications and local wind load requirements.
Before drilling any holes, carefully remove shingles around each mounting point. Install roof flashing at each penetration to create a watertight seal. The flashing slides under the shingles above and sits on top of those below, directing water away from the bolt holes. This step is essential for maintaining your roof’s integrity and warranty coverage.
Drill pilot holes and secure the mounting rails or L-feet directly to the rafters using lag bolts, typically stainless steel to prevent corrosion. Each attachment point must hit solid wood in the rafter center for maximum holding strength. Apply roofing sealant around flashing edges and bolt heads to create additional waterproofing.
Use a level to verify rail alignment in both directions. Even slight misalignment compounds across multiple panels, affecting performance and appearance. Take time to get this right since correcting mistakes after panel installation is difficult and time-consuming.
Step 2: Position and Secure the Solar Panels
With your mounting system secured and verified level, you’re ready to position the panels themselves. This step demands patience and care, solar panels weigh 35-50 pounds each and have glass surfaces that crack if dropped or stressed.
Start by organizing panels near your access point, but not where they create tripping hazards. Most installers use a rope and pulley system or temporary scaffolding to lift panels safely to roof level. Never attempt to carry a panel up a ladder alone.
Once on the roof, position the first panel at your starting point (typically the lower corner of your array). Slide it into the mounting rails, ensuring the panel frame sits flush against the clamps. Tighten clamps gradually in a diagonal pattern to distribute pressure evenly and prevent frame warping.
Leave 0.5-1 inch between adjacent panels. This gap allows thermal expansion, prevents damage from rubbing during wind movement, and provides access for future maintenance. Some mounting systems include built-in spacers to maintain consistent gaps.
As you install each panel, step back periodically to check alignment. Panels should form clean, straight rows both horizontally and vertically. Misaligned arrays not only look unprofessional but can indicate mounting issues that affect long-term performance.
Verify every clamp is tight but not over-torqued, which can strip threads or crack panel frames. A properly secured panel shouldn’t shift when you apply moderate pressure.
Step 3: Wire the Solar Array
Wiring the solar array requires precision and electrical expertise, which is why most jurisdictions mandate that a licensed electrician handle this critical step. The wiring configuration depends on your system design: panels can be connected in series to increase voltage, in parallel to boost current, or in a combination of both to optimize performance for your specific inverter and electrical setup.
Start by connecting the panels according to the system design plan. Each panel has positive and negative terminals, typically accessed through a junction box on the back. MC4 connectors are industry-standard and click together securely, creating weatherproof connections between panels. Your electrician will ensure polarity is correct throughout the string to prevent system failures.
All wiring must run through protective conduit from the array to the inverter location. Conduit shields cables from UV exposure, physical damage, and weather while meeting code requirements. The conduit route should be as direct as possible, with proper supports and seals at penetration points. For garage installations, conduit typically runs along the roof edge, down the exterior wall, and into the garage where the inverter is mounted.
Grounding is non-negotiable for safety and code compliance. Grounding wires connect the panel frames and racking system to your home’s grounding system, protecting against lightning strikes and electrical faults. Your electrician will install grounding lugs and verify continuity throughout the array.
Before energizing the system, all connections undergo inspection to verify they meet National Electrical Code standards and local requirements.
Step 4: Install the Inverter and Electrical Components
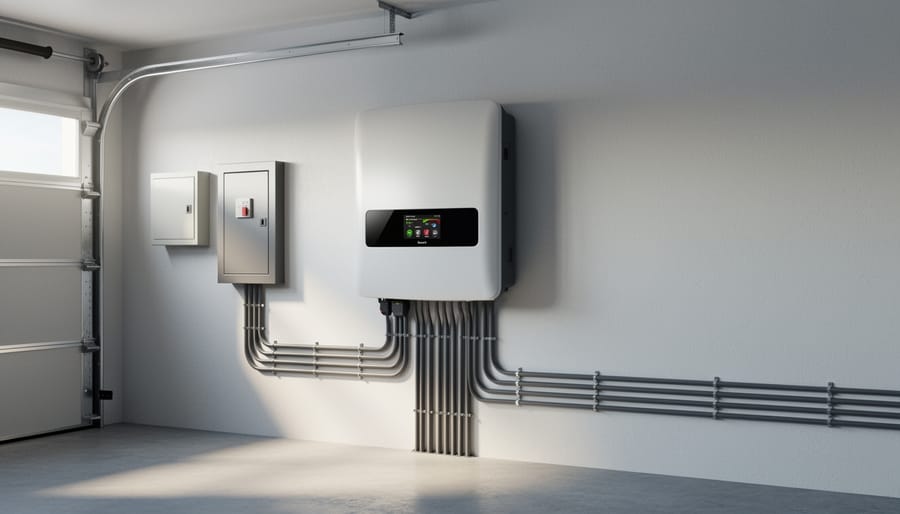
The inverter transforms the DC electricity your panels generate into AC power your home can use. This component typically mounts inside your garage for protection from weather, though outdoor-rated models can install on exterior walls near your electrical panel.
String Inverter vs. Microinverter Systems
String inverters connect multiple panels in a series, with one central unit handling conversion for your entire array. They’re cost-effective and straightforward but create a potential weak link, shading or malfunction in one panel affects the whole string’s performance. Microinverters attach to each individual panel, converting DC to AC right at the source. While more expensive upfront, they optimize each panel independently and make troubleshooting easier since you can monitor performance panel-by-panel.
Mounting and Connecting the Inverter
Choose an accessible spot with adequate ventilation, as inverters generate heat during operation. Most installers prefer mounting on interior garage walls to protect equipment from temperature extremes. Secure the mounting bracket to wall studs, then attach the inverter housing.
Connect the DC input wiring from your solar array, ensuring proper polarity and tight connections. Route AC output wiring to your electrical panel through appropriate conduit. Install required disconnect switches, these safety devices let you isolate the solar system from your home’s electrical system during emergencies or maintenance.
If your system includes monitoring equipment, connect it according to manufacturer specifications. Most modern inverters feature built-in Wi-Fi or cellular connectivity for real-time performance tracking.
Step 5: Connect to Your Home’s Electrical System
Connecting your solar array to your home’s electrical system is the final installation step and must be performed by a licensed electrician. This critical phase transforms your panels from isolated equipment into a functioning power source that feeds your home and potentially sends excess energy back to the grid.
The electrician will install a dedicated breaker in your electrical panel sized appropriately for your system’s output. This breaker allows your solar power to flow into your home’s circuits while providing a disconnect point for safety. If your panel lacks available slots or sufficient capacity, an upgrade may be necessary before connection.
For net metering, where you receive credit for excess power sent to the grid, your utility company typically installs a bidirectional meter that tracks both electricity you draw from and send to the grid. This meter replacement is usually scheduled after your system passes inspection. You’ll need to submit an interconnection agreement to your utility before this occurs, which your installer often handles on your behalf.
The utility must approve and inspect the interconnection before you can activate your system. This process varies by location but generally takes two to six weeks from application to permission to operate. During this waiting period, your system remains installed but inactive. Once approved, your electrician will receive authorization to flip the final switch, and your garage solar panels will begin generating power for your home.
Testing, Verification, and System Activation
Once your solar panels are physically installed, thorough testing and verification ensure the system operates safely and efficiently. This critical phase transforms a collection of equipment into a functioning power plant on your garage roof.
Start with a comprehensive visual inspection. Walk the perimeter of your garage and examine the installation from ground level, looking for any obvious issues with panel alignment or mounting integrity. Check that all panels sit flush against the racking system without gaps or tilting. Examine flashing around roof penetrations to confirm proper sealing, you shouldn’t see any exposed roofing material or gaps where water could intrude. Inspect conduit runs for secure attachment and proper weatherproofing at entry points. Inside your garage, verify that all wiring connections are enclosed in junction boxes with no exposed conductors, and confirm that the inverter is mounted securely according to the engineering blueprint for your system.
Electrical testing comes next and typically requires professional expertise. Your installer will use a multimeter to verify DC voltage from the solar array matches expected output based on the number of panels and their series/parallel configuration. They’ll check that grounding connections show proper continuity and that polarity is correct throughout the system. The inverter startup sequence follows a specific protocol: it should power on, run self-diagnostics, detect the solar array, and begin converting DC to AC power only after confirming grid connection and proper voltage parameters.
Setting up your monitoring system provides ongoing visibility into performance. Most modern inverters include Wi-Fi connectivity and companion apps that display real-time production data. During initial setup, verify the system shows current power output (measured in watts or kilowatts), daily and lifetime energy production, and system status indicators. On a sunny day, production should ramp up steadily through morning, peak at midday, then decline toward evening, a bell-curve pattern that confirms normal operation.
Utility and building inspections represent the final hurdle before official activation. The building inspector verifies code compliance for structural mounting, electrical connections, and safety equipment like disconnect switches. The utility inspection confirms proper metering setup and interconnection agreement compliance. Inspectors may request access to the roof, the inverter location, and your electrical panel. Pass these inspections, and your utility will grant permission to operate, enabling net metering and officially connecting your garage solar system to the grid.
Monitor your system’s first few weeks of operation closely. Compare actual production to estimates from your system designer, accounting for weather variations. Most systems include alerts for performance anomalies or equipment faults, ensuring you catch issues early when they’re easiest to address.
Working with Professional Installers: What to Expect
Most garage solar installations follow a predictable timeline of one to three days, depending on system size and roof complexity. The process starts with a detailed site assessment where installers evaluate your roof structure, electrical panel capacity, shading patterns, and optimal panel placement. They’ll take measurements, photograph the site, and discuss your energy strategy to design a system that matches your goals.
Professional crews handle garage-specific challenges efficiently. They know how to work around existing structures like vents and skylights, adapt to various roof pitches and materials, and maintain proper clearances for code compliance. Expect clear communication throughout the project. Reputable installers provide a detailed schedule, text or call before arrival, explain each phase as they work, and address your questions without making you feel rushed.
During installation, crews typically arrive early and work systematically through mounting, panel placement, and electrical connections. They’ll coordinate required inspections with local building departments and your utility company. Most installers clean up thoroughly, removing all packaging and debris before final walkthrough.
Professional warranties typically cover workmanship for 10 to 25 years, separate from manufacturer panel warranties. This protects you if mounting systems fail, leaks develop from roof penetrations, or electrical connections need service. The best installers also provide post-installation support, helping you understand monitoring systems and answering questions as you learn to track your production.
One California homeowner chose a garage installation after realizing the detached structure offered better sun exposure than their main house. Working with experienced installers, they completed the project in two days with minimal disruption. The system now offsets a significant portion of their electricity use while preserving their home’s curb appeal.
Maintenance and Ongoing Care
Once your garage solar system is operational, minimal ongoing care keeps it performing optimally for decades. Most homeowners find maintenance straightforward, but consistent attention prevents small issues from becoming costly problems.
Routine Maintenance Tasks
Solar panels are remarkably low-maintenance, but a few regular practices ensure maximum energy production:
- Visual inspection every few months for cracks, loose connections, or debris accumulation
- Panel cleaning twice yearly or after major storms (more often in dusty or pollen-heavy areas)
- Performance monitoring through your system’s app or web portal at least monthly
- Seasonal checks of mounting hardware to verify secure attachment
- Annual review of inverter displays for error codes or unusual readings
For cleaning, use a soft brush or squeegee with plain water during cooler morning hours. Avoid harsh chemicals, abrasive materials, or high-pressure washers that can damage panel surfaces or seals. If your garage roof is steep or high, hire professionals rather than risking falls.
Monitoring and Professional Service
Track your system’s daily and monthly production through its monitoring platform. Sharp drops in output signal potential issues: shading from tree growth, soiling that rain can’t wash away, or equipment malfunction. Compare performance to your installer’s projections, accounting for seasonal variation.
Most inverters and panels carry warranties of ten to twenty-five years. Keep documentation accessible and understand what’s covered. Call for professional service if you notice persistent error messages, physical damage, water intrusion around mounting points, or production drops exceeding fifteen percent without obvious cause like extended cloudy weather.
Regular monitoring isn’t busywork, it’s how you protect your investment and maintain the strong returns that make garage solar financially rewarding.
Frequently Asked Questions
Can any garage roof support solar panels?
Most garage roofs can support solar panels, but you’ll need a structural engineer to assess your specific roof’s load-bearing capacity before installation. Older structures or those with signs of deterioration may require reinforcement.
How does garage installation differ from house roof installation?
The installation process is essentially identical, but garages often provide easier access, fewer roof penetrations to work around, and more flexibility in panel orientation since aesthetic concerns are typically lower. Detached garages may require trenching to connect wiring to your main electrical panel.
What if my garage roof isn’t south-facing?
East and west-facing roofs still produce substantial energy, though slightly less than optimal south-facing orientations in the Northern Hemisphere. A professional installer can calculate expected production and help determine if your garage roof makes financial sense for your goals.
Do I need to upgrade my electrical panel?
It depends on your current panel’s capacity and whether you have available breaker slots. Many homes installing systems comparable to 5kW solar costs don’t need panel upgrades, but your installer will assess this during the site evaluation.
How long does installation take?
A typical garage solar installation takes one to three days for the physical work, though permitting and utility interconnection processes can extend the overall timeline by several weeks.
What happens if I need roof repairs later?
Reputable installers can temporarily remove and reinstall your panels if roof work becomes necessary. This is why installing solar on roofs with significant remaining lifespan makes the most financial sense.
These questions reflect the practical concerns homeowners face when considering garage solar installations. Understanding the answers helps you have informed conversations with installers and set realistic expectations for your project. Remember that every garage and situation is unique, so professional assessment of your specific roof condition, electrical capacity, and local requirements remains essential before moving forward with installation.
Installing solar panels on your garage roof represents a significant step toward energy independence and environmental responsibility. While this guide has walked you through each phase of the installation process, the complexity and safety requirements make professional installation the recommended path for most homeowners. That said, understanding what’s involved puts you in a stronger position to evaluate quotes, ask informed questions, and verify that your installation meets quality standards.
Cost concerns are valid, but exploring solar financing options often makes systems accessible without large upfront investments. The right financing structure, combined with proper system design and professional installation, helps you maximize solar ROI over the decades your panels will generate power.
Your garage roof can become more than shelter for vehicles. It can anchor your transition to clean energy while reducing monthly utility costs. At Jumping Cable Solar Homes, we handle every aspect from initial assessment through installation and ongoing maintenance, with strategic financing assistance to fit your budget. Join the renewable energy movement with confidence and support that lasts as long as your system does.